How to Clean Refrigerator Coils (Safely and Thoroughly)
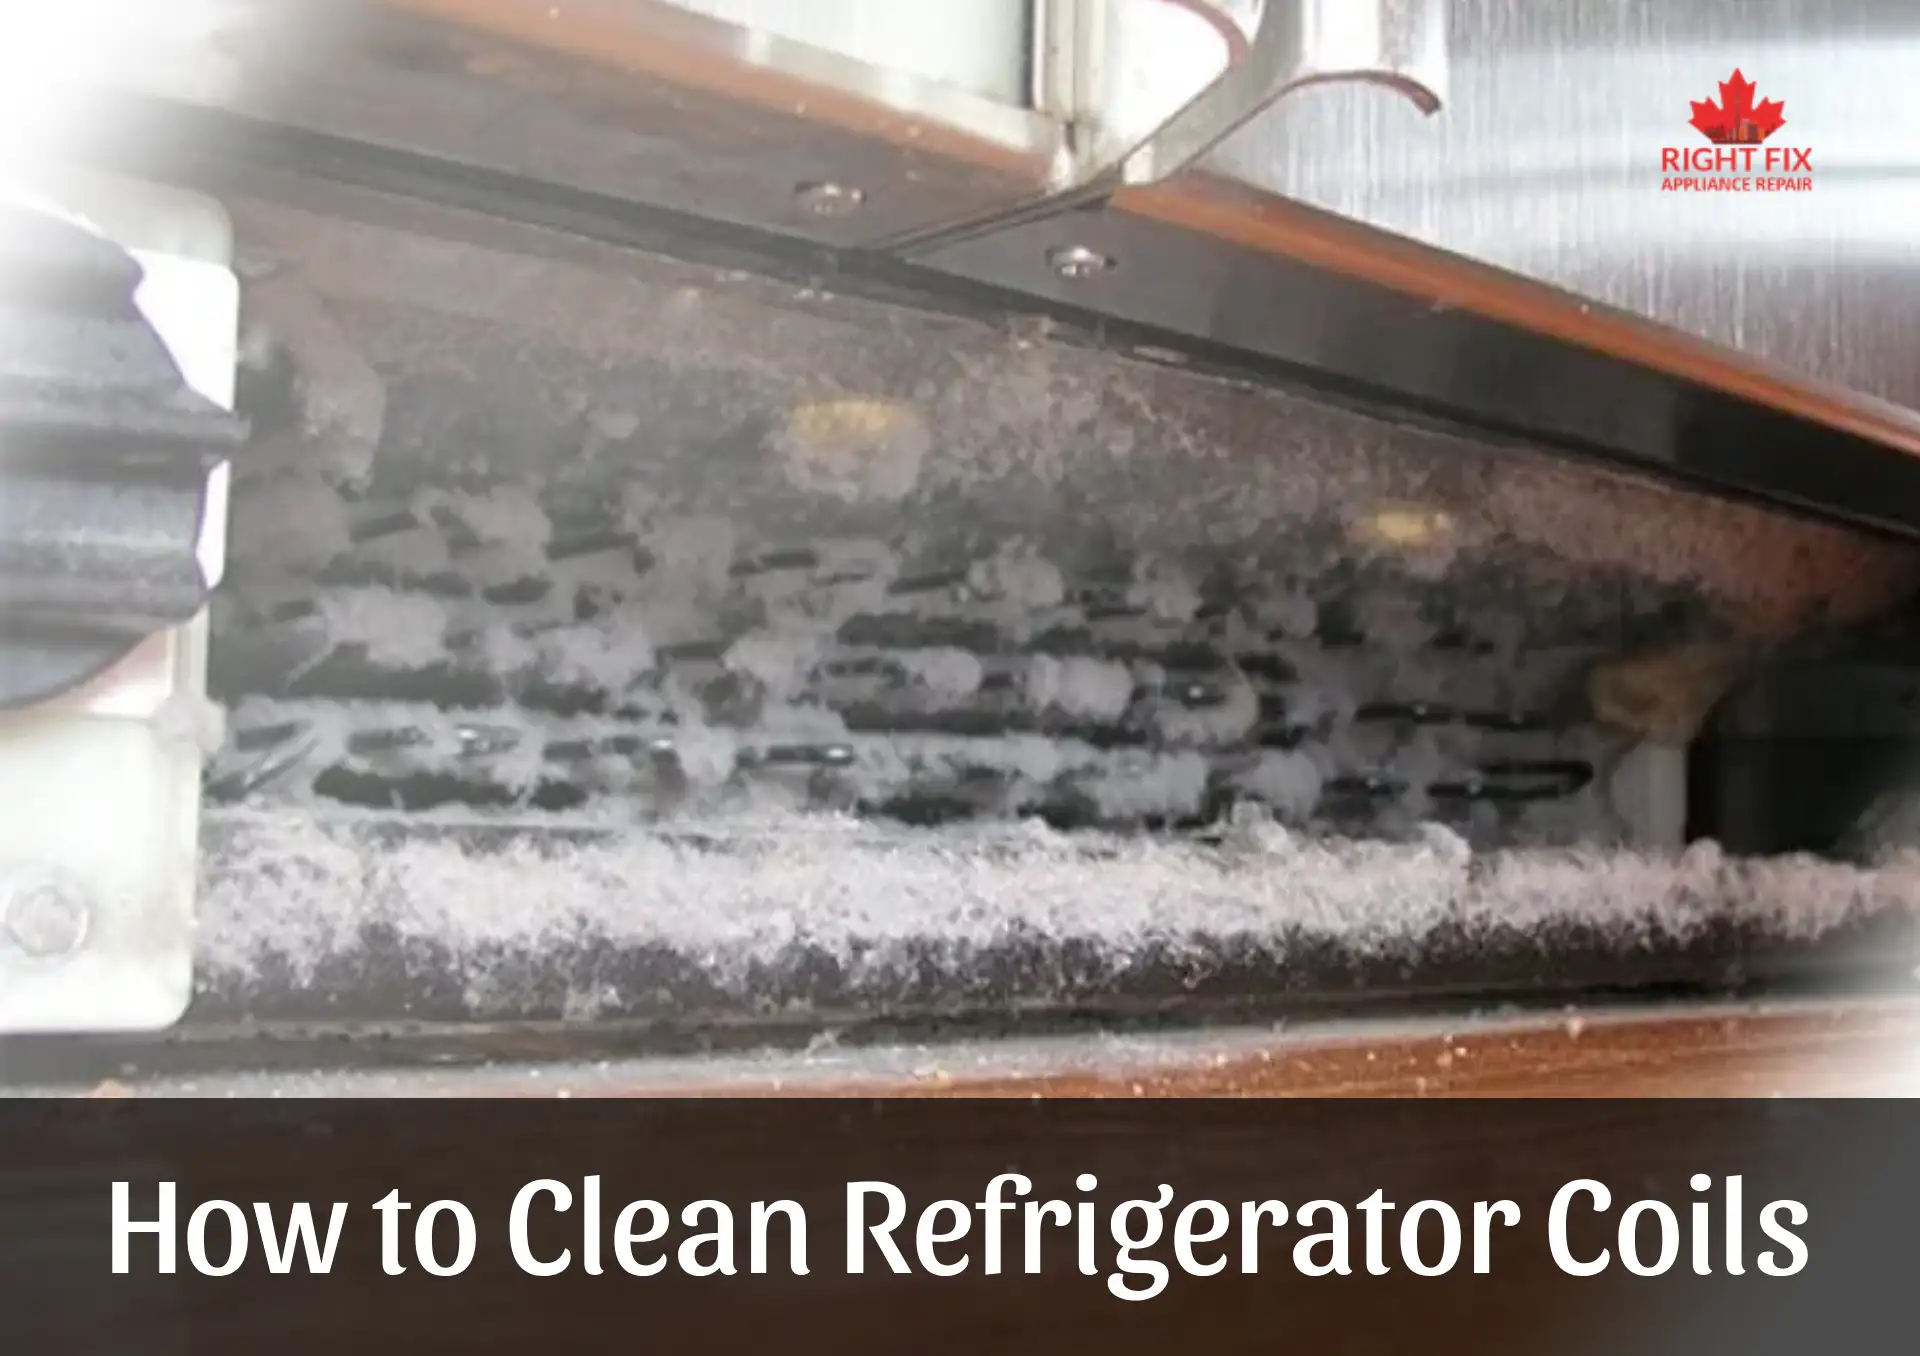
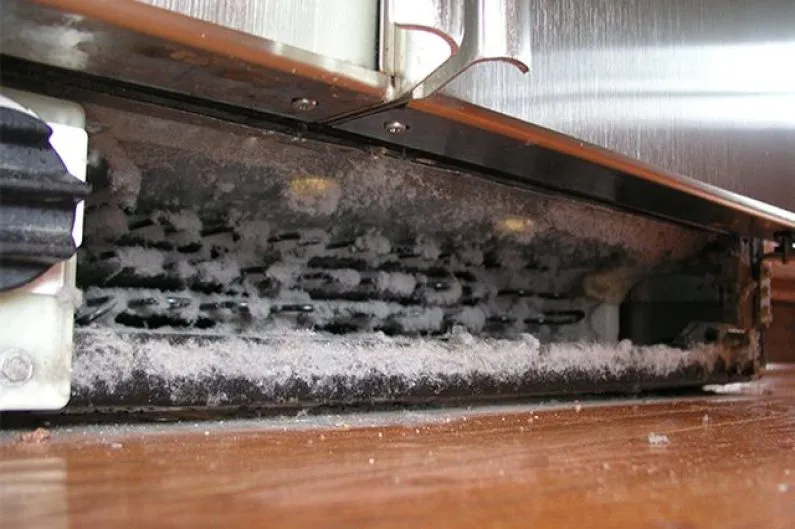
When a refrigerator starts running nonstop, struggles to keep things cold, or the sides feel unusually warm, dirty condenser coils are often the culprit. Dust, pet hair, and kitchen grease act like a sweater wrapped around those coils, trapping heat that should be released into the room. The good news? Cleaning them is straightforward, inexpensive, and can restore cooling performance while easing the load on your compressor.


Quick facts before you start
-
Time: 20–30 minutes
-
Difficulty: Easy to moderate
-
How often: Every 6–12 months (every 3–6 months if you have pets or a dusty kitchen)
-
Benefits: Better cooling, quieter operation, lower energy use, longer appliance life
What you’ll need
-
Vacuum with a crevice tool or narrow nozzle
-
Condenser coil brush (long, flexible; typically inexpensive)
-
Flashlight or phone light
-
Microfiber cloths or paper towels
-
Screwdriver or nut driver (for toe-kick or rear access panels)
-
Gloves and a dust mask (optional but nice to have)
-
Cardboard or towel to protect flooring when moving the fridge
Where are the coils on my fridge?
Coil placement varies by model:
-
Bottom-front coils (common on many freestanding units): Hidden behind a toe-kick grille at the base.
-
Rear-mounted coils (older units): A black radiator-like grid on the back.
-
Bottom-rear coils with a fan (many newer or counter-depth models): Accessible by removing a lower rear panel.
-
Built-in refrigerators (pro-style): Often vent at the top or bottom with service panels.
If you don’t immediately see the coils behind the toe-kick, check the rear lower panel. Have your model number handy for the manual if you need confirmation.
Safety first
-
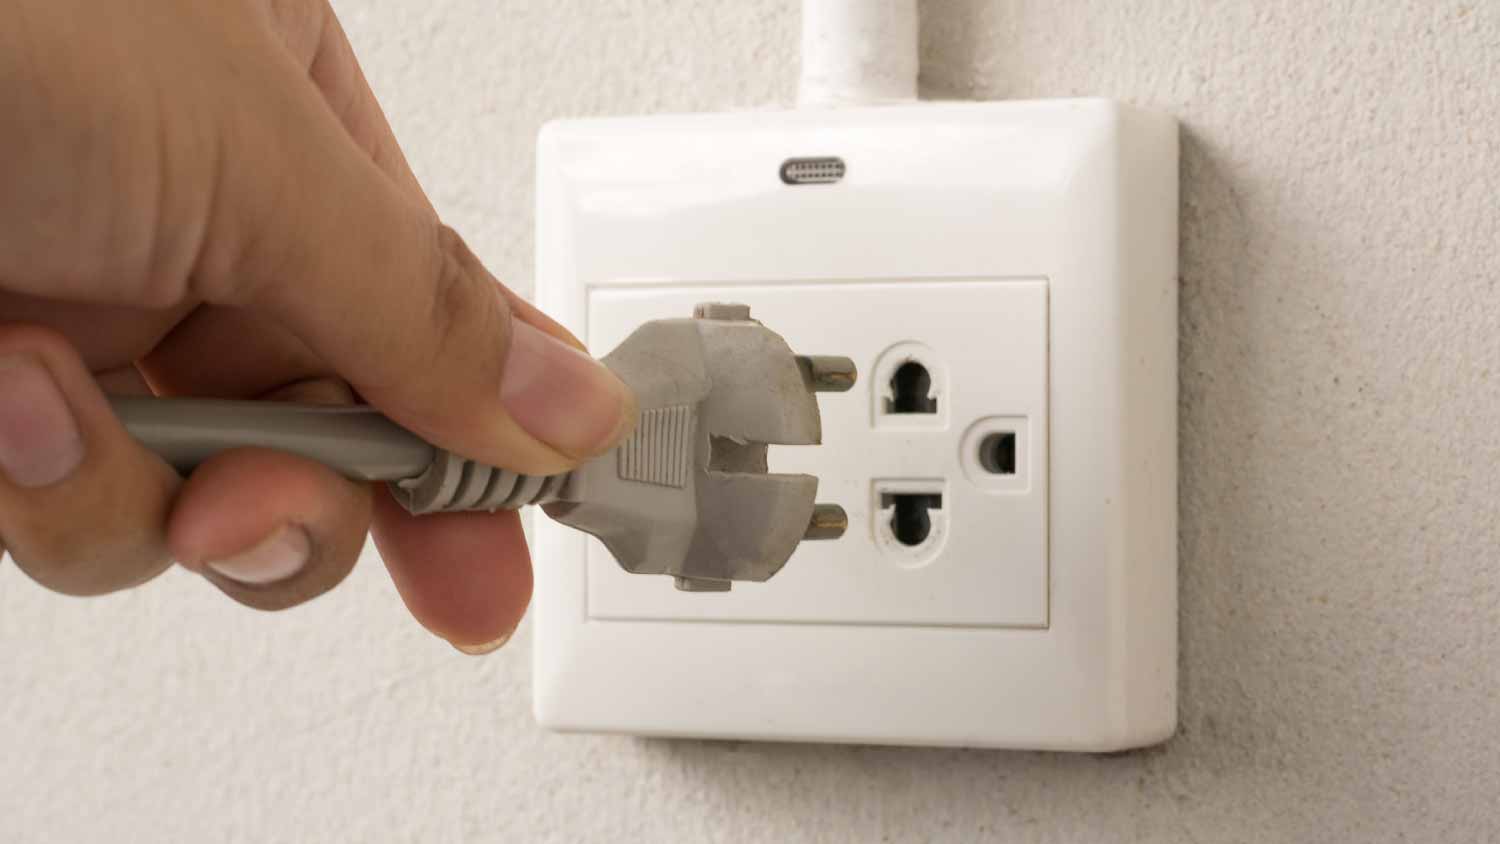
Unplug the refrigerator. If access is awkward, turn off the outlet at the breaker.
-
Shut the water supply to the ice maker if you’ll be moving the unit significantly.
-
Protect the floor. Place a towel/cardboard under the rollers or feet.
-
Work gently. Coils are delicate. Avoid bending fins or pulling on wires.
-
Mind the condenser fan. Keep fingers and tools clear; it may spin freely.
Step-by-step: Deep-cleaning refrigerator coils
1) Power down and access the coils
-
Pull the refrigerator forward a few inches if you need more space.
-
For bottom-front coils, pop off the toe-kick grille (usually snaps off).
-
For rear coils, remove the lower back access panel (a handful of screws). Keep screws in a cup.
2) Dry vacuum the bulk debris
-
Use the crevice tool to vacuum visible dust bunnies from the coil faces and surrounding cavity.
-
Work slowly to avoid bending fins. Expect a surprising amount of lint if you have pets.
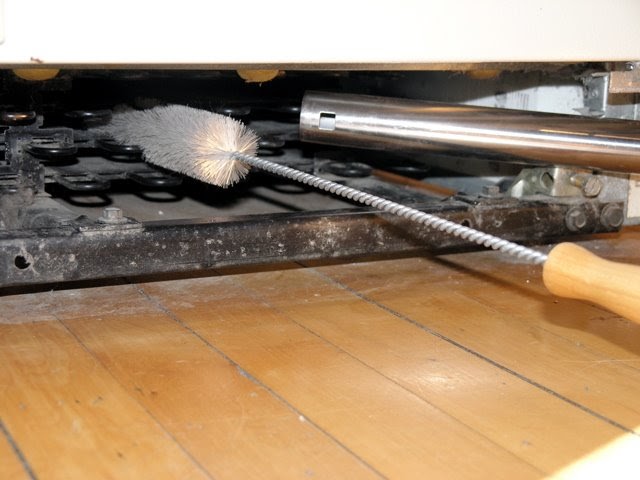
3) Loosen packed dust with a coil brush
-
Feed the coil brush along the coil runs, using short strokes to dislodge debris the vacuum missed.
-
Alternate: Brush, then vacuum, then brush again. The brush will pull fluff from hard-to-reach spots.
4) Clean the condenser fan and air path

-
If your model has a condenser fan (common on bottom-rear layouts), carefully vacuum dust on the blades and around the motor housing.
-
Hold the fan still with a finger or a pencil while vacuuming to avoid spinning it like a turbine.
5) Detail the area
-
Wipe the cavity floor and nearby surfaces with a dry microfiber or slightly damp cloth (avoid dripping water near electrical parts).
-
For sticky grime, a lightly damp cloth with mild dish soap works; dry immediately.
6) Reassemble and restore power
-
Reinstall the rear panel or toe-kick grille.
-
Slide the refrigerator back gently, ensuring the power cord and water line aren’t pinched.
-
Plug in the unit and reopen the water supply (if closed).
-
Set temps to ~4°C / 39°F for the fresh-food section and -18°C / 0°F for the freezer, then give it several hours to stabilize.
Signs your coils were overdue
-
The compressor ran nearly nonstop before cleaning.
-
The fridge felt warm on the sides or along the door jamb.
-
Frost crept into the freezer or the fridge section hovered a few degrees too warm.
-
Higher energy bills without another obvious cause.
Special notes by fridge type
-
Rear-grid (older) models: These are the easiest—vacuum the grid and the floor behind the unit.
-
Bottom-rear with fan: Prioritize the fan area and the air pathway; clogging here hurts performance the most.
-
Built-in units: Panels are sometimes tight; take your time and avoid scratching cabinetry. If in doubt, consult the model-specific service guide.
Common mistakes to avoid
-
Skipping unplugging. Safety first; don’t work around live components.
-
Using water directly on coils. Moisture can short electronics and create mud from dust.
-
Crushing the fins. Bent fins restrict airflow—be gentle with the brush.
-
Forgetting the fan. A clean coil with a dusty fan still runs hot.
-
Pushing the fridge back onto kinks. Check hoses and cords as you re-position.
How often should you clean?
-
Standard households: Every 6–12 months.
-
Pets or open-plan kitchens: Every 3–6 months due to hair and oil mist.
-
New appliances: Put a reminder on your calendar; the first cleaning will tell you how fast dust builds up in your home.
Troubleshooting after cleaning
-
Still not cold enough? Verify door gaskets seal well; look for tears or gaps.
-
Noisy operation continues? The condenser fan or evaporator fan may be worn.
-
Persistent warm temps or frequent short-cycling? You could be dealing with a failing start relay, low refrigerant, a dirty evaporator coil (inside the freezer compartment), or a control issue.
If you’ve followed the steps and the fridge still struggles, it’s time for professional diagnostics. If you can’t fix it, we can—book a repair appointment and get a technician to take a look.
Light maintenance between deep cleans
-
Monthly: Vacuum the intake grille lightly (no disassembly).
-
Quarterly: Check that the fridge sits level; doors should self-close from a few centimeters open.
-
Anytime: Keep a few centimeters of clearance at the sides and back so the unit can breathe.
Location we Service
- Ajax
- Alliston
- Aurora
- Bolton
- Bradford
- Brampton
- Brantford
- Burlington
- Caledon
- Cambridge
- Concord
- East York
- Etobicoke
- Georgetown
- GTA
- Guelph
- Halton Hills
- Hamilton
- Innisfil
- Keswick
- King City
- Kitchener
- Kleinburg
- Maple
- Markham
- Milton
- Mississauga
- New Tecumseth
- Newmarket
- North York
- Oakville
- Orangeville
- Oshawa
- Pickering
- Richmond Hill
- Scarborough
- Schomberg
- Stouffville
- Thornhill
- Toronto
- Unionville
- Uxbridge
- Vaughan
- Waterloo
- Whitby
- Woodbridge